
 Every musician and producer needs an audio interface at some point. Picking the right one can feel like falling down a rabbit hole; There’s all these inputs, outputs, prices, and specs that get thrown around in reviews and on product pages. But the good news is that there’s a way to cut through the noise and pick an interface that fits your actual needs, not just what’s eye-catching on a spec sheet.
Skip the feeling of being overwhelmed or locked into decision paralysis. Here’s a practical plan to help you zero in on which audio interface will really serve your recording and production goals, and avoid those classic regrets.
Know Your Workflow (Before Shopping)
It’s easy to get lured by the latest gear. But if you don’t know how many tracks you want to record at once, or which instruments and gear you really plan to connect, you could waste cash or end up limited later. Start by mapping out what your setup looks like now and what you’d like it to look like in the next year or two.
Core Questions:
- How many mics or instruments will you need to record at the same time?
- Do you need to hook up synths or external drum machines via line inputs?
- Are you planning to record a full band, or just vocals and guitar?
- Will you want to grow into more complex setups down the road?
Keep these answers written down; they’ll help you focus on practical features instead of flashy marketing terms.
Budget: Set Limits, Not Wishes
There’s an audio interface for every budget, but spending more doesn’t automatically mean better recordings and – equally important – better workflow. Decide what you’re comfortable spending, and stick to it as you research. I always recommend factoring in a bit for cables, stands, or adapters; small things can add up quickly.
Don’t get distracted by extras like bundled software unless that adds value for your setup. Focus on quality, reliable performance, and how well the interface fits your workflow. If you’re just getting started, most modern interfaces provide superb sound. Buying within your means protects you from buyer’s remorse and lets you invest steadily as you grow.
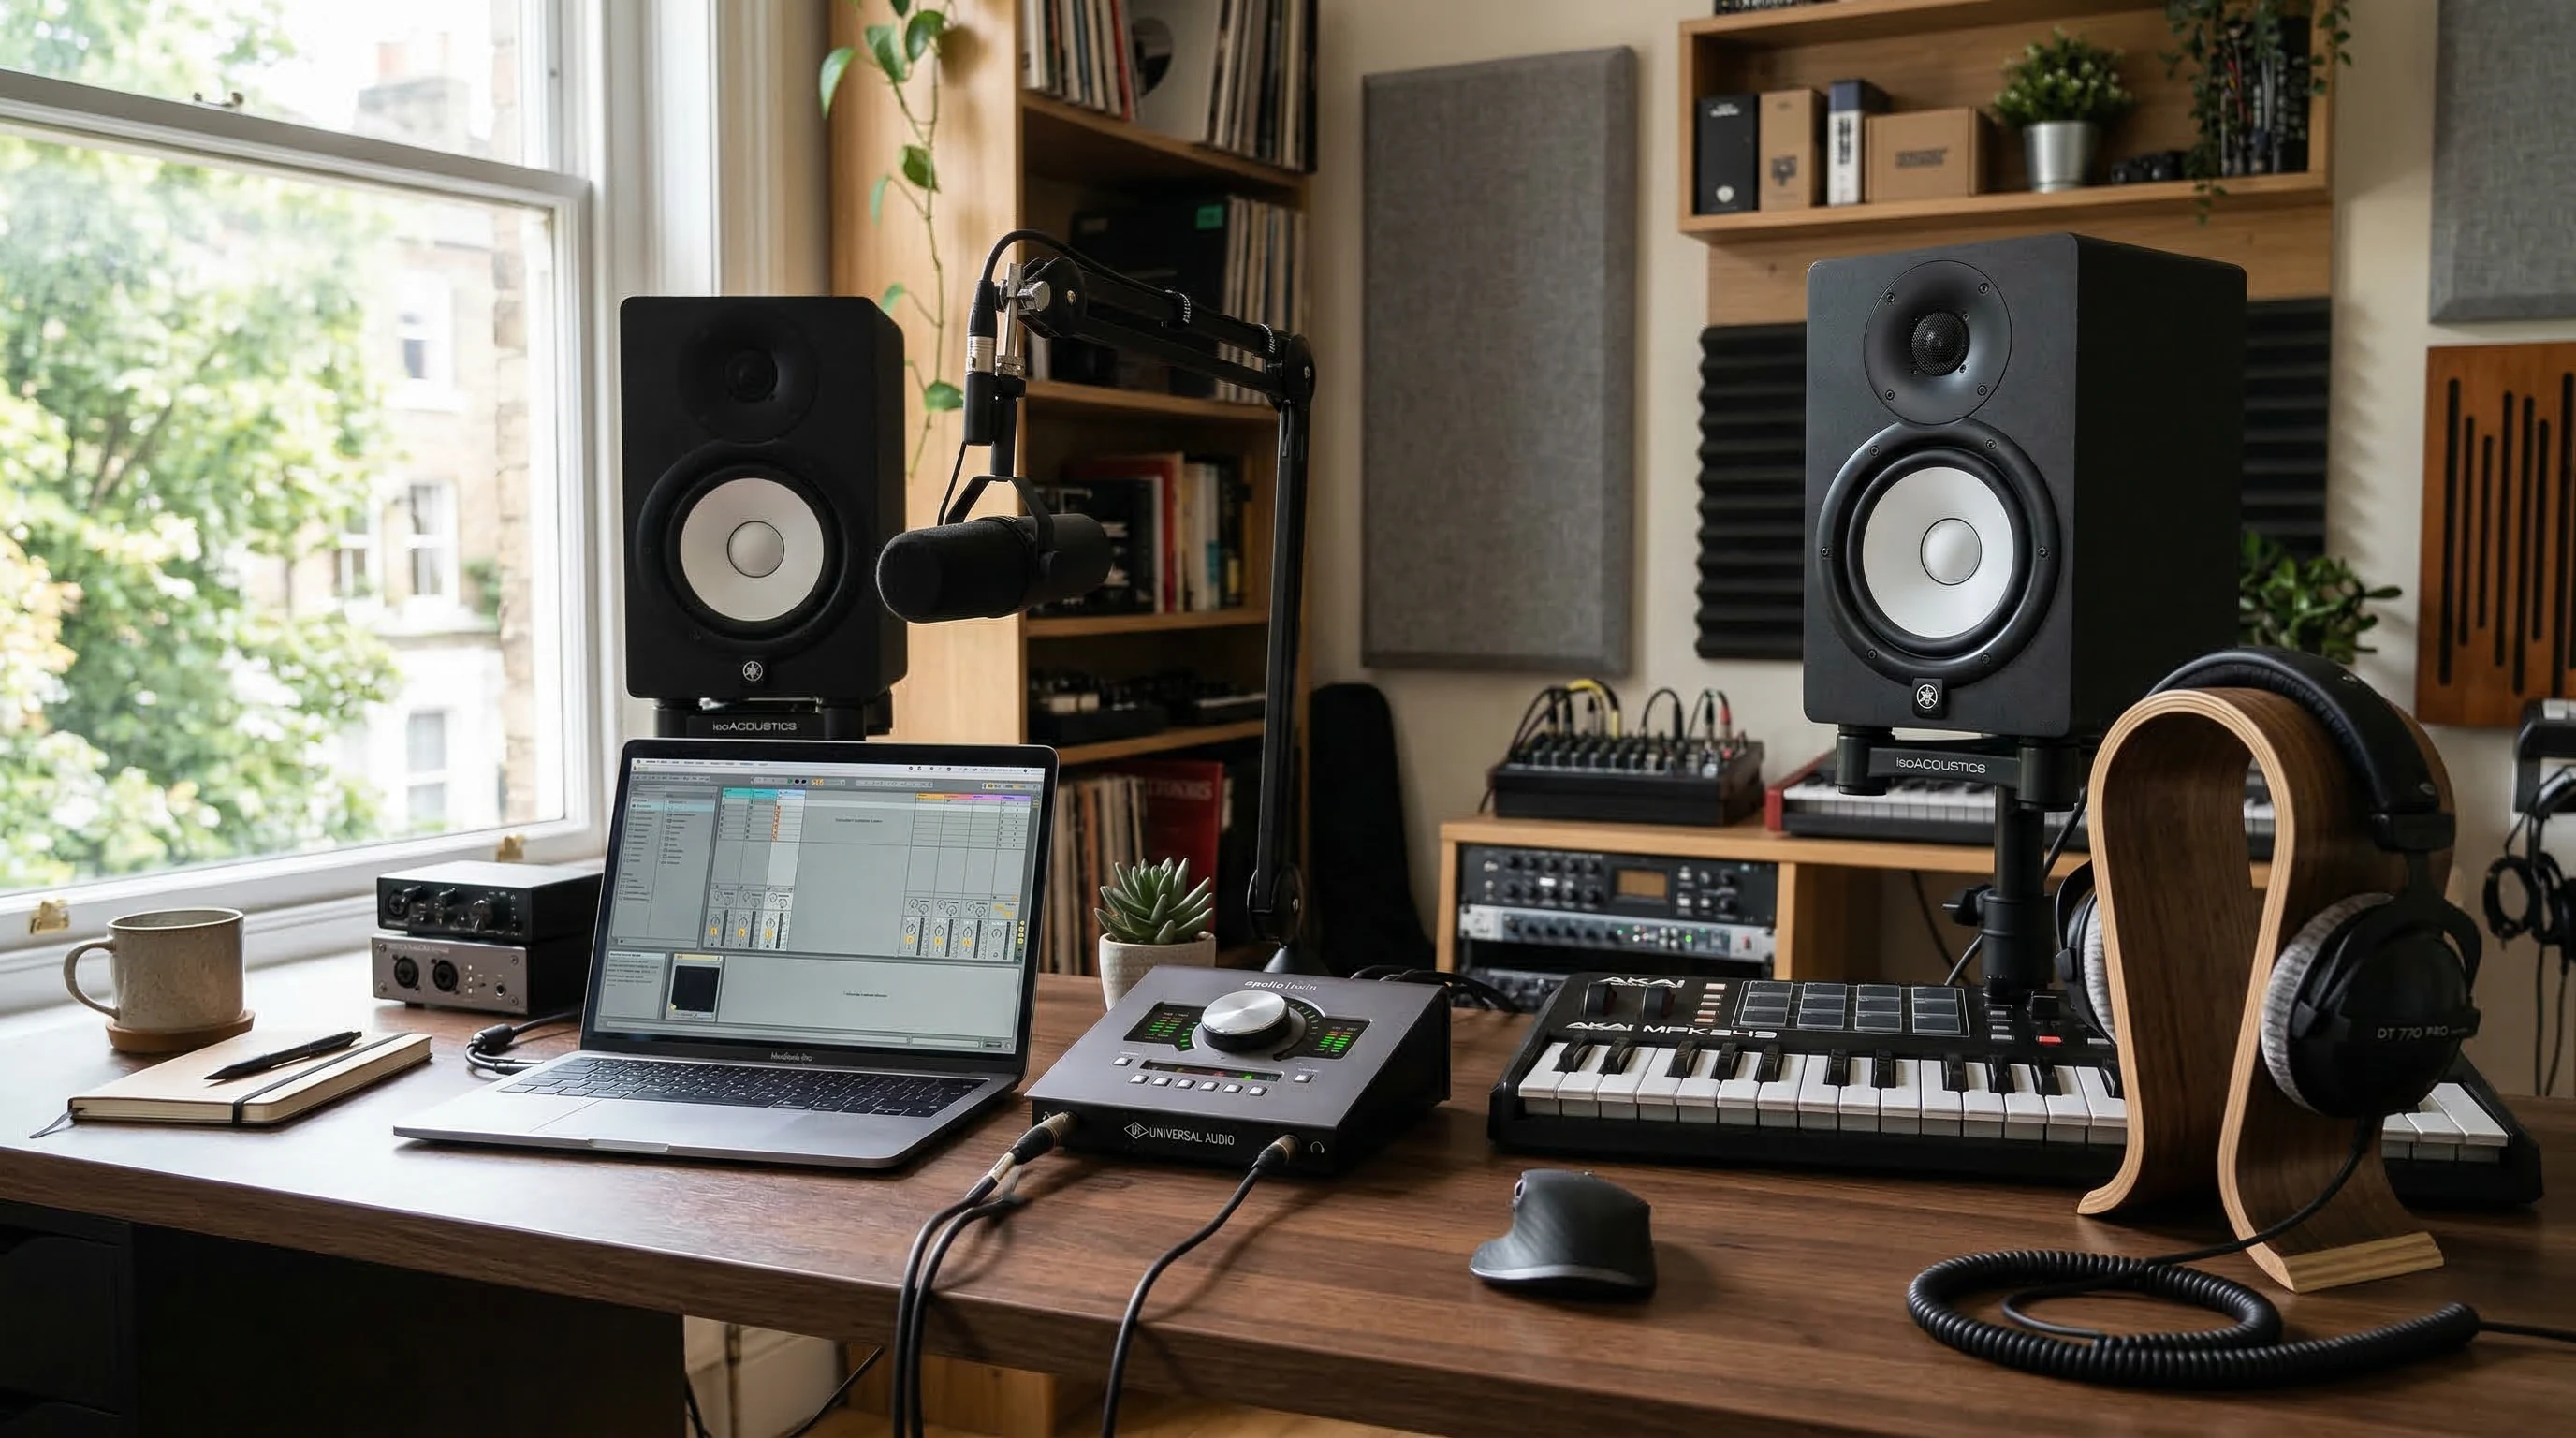
Inputs and Outputs: Get What You’ll Actually Use
The heart of any audio interface is its input/output setup. Some interfaces come loaded, but most producers and musicians don’t use all of those ports. Make a simple list of what you want to connect at once, and double-check manufacturer specs before clicking “buy.”
Inputs:
If you’re mostly recording vocals or guitar, two high quality mic preamps and a single instrument input might be all you need. Recording drums, a full band, or your stack of hardware synths? Consider interfaces with four or eight inputs. Look for combos (XLR/¼” jacks) if you want maximum flexibility.
Outputs:
Do you need more than one pair of monitor outputs? Want to use external gear or send audio to outboard processors? Think about headphone outputs too; two of them can be super useful for collaborating.
Plenty more details are covered in my audio interface features guide. If you’re in doubt, future-proofing for just one or two extra channels can be a smart move, but avoid enormous I/O counts you’ll never touch.
Desktop vs. Rackmount: Fit the Space, Fit Your Style
The physical size and style of your interface matter more than people might think. If you’re mobile or short on space, a desktop interface can live right next to your keyboard or even toss in a backpack. Rackmount units really only make sense for dedicated studios or if you plan to expand a lot in the future.
I’ve used both, and honestly, desktop interfaces are usually more practiacal for day-to-day work. Rack gear looks next-level cool, but it’s not always necessary unless you’re building out a fullblown studio.
Ease of Use: Keep It Simple, Focus on Flow
No one wants to get stuck in menu hell. Simple layout, clear labeling, and easy-to-reach volume knobs make a difference, especially when you’re moving fast or feeling creative. Some interfaces rely on touchscreens or digital menus, which might sound neat but can slow things down if you’re just trying to lay down an idea fast.
I like to look for interfaces that offer clear metering and big, obvious controls for gain and output levels. The best interface is the one you hardly notice once you’re producing.
Mixer & Routing Software: Don’t Overlook the Software Side
Every major audio interface includes some form of routing and mixer software that handles things like direct monitoring, loopback, or custom cue mixes. Some are basic, some are fullblown virtual consoles.
I recommend checking out screenshots or demos of the software. Simple software is perfect if you just need to record, while more advanced software lets you set up cue mixes, make quick monitor adjustments, and even do zero latency processing.
Support and Longevity: Pick Something Built to Last
I’m still using an Apogee Duet that’s about a decade old. Apogee keeps their software updated, meaning my interface doesn’t end up as an expensive paperweight every time I update my computer.
Check the support history of the brand you’re considering. Look for brands with a reputation for giving users updates and helping solve small hardware issues. Metric Halo, for example, offers hardware upgrades years down the line. Good support means you don’t have to panic every time there’s a new macOS or Windows release.
Sometimes it’s less about the raw specs and more about how long your investment will stay usable and supported. Pick a brand that treats users well.
Practical Decision Checklist
- Write down your actual recording needs. This includes what you record, how many sources, and if you might expand within a year or two.
- Decide your budget range. Only look at options you can comfortably afford.
- Count needed inputs/outputs. List them, not what you wish you had; what you’ll actually use.
- Pick a format. Desktop or rackmount; what fits where you work?
- Skim the software interface. Simple? More advanced? What feels right for your workflow?
- Look up support. Quick search for driver updates, repair policies, and general user experiences online.
Questions & Troubleshooting
What if I want to upgrade later?
Some interfaces allow more inputs via ADAT or expansion ports. If you think you’ll grow, make sure the interface supports this or check if the brand offers trade-up discounts. You can always add more gear as your needs expand, so choosing a flexible interface will give a boost to your setup in the long term.
What if I’m not tech savvy?
There are interfaces known for plugandplay operation (like the simpler SSL, Focusrite or PreSonus models) that can get you recording right away. Simple is better if you don’t like fiddling with menus or want the lowest learning curve. It’s always good to ask friends or check in with user reviews to spot interfaces that just work.
What about latency?
Almost every modern interface delivers workable latency and direct monitoring, but if you want realtime monitoring for guitar sims or tracking vocals with processing, direct monitoring with DSP powered effects can make sessions smoother. Make sure to check the interface specs for measurements on latency if you’re planning to record overdubs or use soft synths live. Low latency can really take up your experience a notch.
The Real Secret Sauce
Choosing an audio interface isn’t about getting the one with the longest feature list. It’s about knowing what kind of artist or producer you really want to be, and building your gear decisions around that. The next time you see a reviewer brag about wild specs, pull out your checklist and see if any of it really impacts your next session or mix.
Put your needs first, and let the specs follow. That’s how you get a setup you actually enjoy every time you sit down to create. Wrapping up, having an audio interface that truly fits you is what helps your creativity shine. Take your time, do some digging, and track down the gear that gives your workflow a boost.